Last updated: 2 Mar 2025
If you're having problems with Windows on your PC or want a fresh copy of Windows without the clutter of old files or apps, you can reinstall Windows to try and fix your issues and return your PC to a cleaner state.If your PC isn't performing as expected or working slowly, then first try this: Tips to improve PC performance in Windows.
After trying those tips, if your PC still not performing as expected, then you should reinstall Windows.
Here I am going to show you, how to install the original Windows 10 for FREE using installation media (bootable USB/Pendrive) for FREE.
Looking for Windows 11: How to install Windows 11 for FREE?
Reinstallation guide from Microsoft: Reinstall Windows with the installation media
Make sure that your PC meets Windows 10 minimum system requirements:
- Processor: 1 GHz compatible processor or System on a Chip (SoC)
- Memory (RAM): 1 GB for 32-bit or 2 GB for 64-bit
- Storage: 16 GB for 32-bit OS and 32 GB for 64-bit OS
- Graphics card: DirectX 9 with WDDM 1.0 driver
- Display: 800x600
Note: reinstalling Windows will remove all your installed Apps and software.
But you can Preserve your, personal data (e.g.: Desktop, Documents, Downloads, Music, Pictures, Videos, etc.) and, data stored in partitions other than the Windows partition.
Just copy all personal data to Local Disk (D:) or other (other than Local Disk C).
After that, note down the size of the Local Disk C (Windows Partition).
Step 1: Keep a copy of the Driver's setup.
Although Windows can detect and install most device drivers automatically.
But on some PC, Windows may fail to install drivers. So, it is recommended to download essential drivers (such as the network adapter and graphics card drivers).
You can download the original drivers from your PC manufacturer's website. Here is the list of websites from the most popular computer manufacturers to download the latest device drivers.
If original drivers are unavailable on your PC manufacturer's website, then you should backup drivers.
To backup Drivers in Windows:
- Create a Driver Backup folder:
Open This PC > Local Disk (D:).
Press Windows + Shift + N to create a new folder.
Type "Driver Backup" and then press Enter to rename it to Drivers Backup.
- Open Command Prompt with admin rights:
Press Windows + S to open Windows Search.
Type cmd. In the search results, right-click on "Command Prompt" and select "Run as administrator".
Select Yes on the "User Account Control".
- Run Driver backup command:
In "Command Prompt", type the following command line and press Enter:
dism /online /export-driver /destination:"D:\Driver Backup"
NOTE: If you created the folder with the name “Driver Backup” in your local disk (E:), you should type the command line dism /online /export-driver /destination:”E:\Driver Backup”
When the process is completed, you’ll see the message:
"The operation completed successfully."

- Then Close × the Command Prompt.
Now you can go to the Driver Backup folder to view the backup of all the drivers.


Step 2: Create Windows Installation Media (bootable Pendrive)
After Driver Backup, you need to create Windows Installation Media or Windows USB.
To perform a clean installation of Windows, you'll need a USB bootable media, which you can easily create using several tools, including the Microsoft Media Creation tool or third-party tools, such as Rufus. I recommend you use Rufus because it is very light and fast.
To create a Windows USB bootable Pendrive, you will need a minimum 8 GB empty Pendrive, Windows 10 ISO file and Rufus.
To create a Windows USB bootable Pendrive, you will need a minimum 8 GB empty Pendrive, Windows 10 ISO file and Rufus.
To download the Windows 10 ISO file:
- Open the Microsoft Software Download (microsoft.com/software-download) page on your favourite browser.
- On the "Software Download" page, click on "Windows 10".

- Press Ctrl + Shift + I to open Developer tools.

- Press Ctrl + Shift + M keyboard shortcut to Toggle device emulation.

- Press Ctrl + Shift + R to Hard Refresh the webpage.

- Now on the website, under the "Select Edition section", click on the "Select Edition" drop-down menu and select "Windows 10 (multi-edition ISO)".

- Click on the Confirm button.

- Under the "Select the product language" section, click on the "Choose one" drop-down menu and select English (or your preferred language).

- Click on the Confirm button.
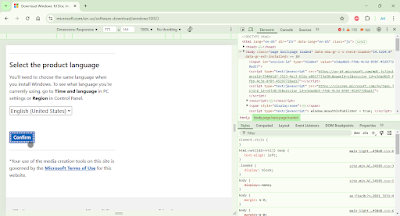
- Now, under "Windows 10 English" click on "32-bit Download" if your PC has 1 GB RAM. Or click on "64-bit Download" if your PC has 2 GB or more RAM.
Please note: download links are valid for 24 hours from creation.
This multi-edition Consumer media includes the following editions: Home, Pro, Pro for Workstation, Pro Education and Education.


To download Rufus:
- Open the Rufus.ie (official Rufus download page) page on your favourite browser.
- Under the Download section, click on rufus-x.xp.exe to download Portable Rufus.


After downloading both files, you can now create Windows USB.
To create a Windows USB Pendrive:
- Insert the 8 GB empty Pendrive.
- Open Rufus on your PC.
- On the "User Account Control", click on Yes.
- On the "Rufus update policy", click on Yes.

- Under Device, select the USB Pendrive.

- Click on the Select button.

- Now navigate to the Downloads folder (or the folder where you downloaded the ISO File), select the Windows ISO file (Win10_22H2_English_x64v1.iso) and click on Open.
It will take some time to scan the ISO file.
- If you are creating a Windows USB for your current PC, then Rufus will automatically select the correct option under the Partition scheme and other options.
And if you are creating it for another PC then check BIOS Mode in System Information of that PC.
If it is Legacy, then select MBR under the "Partition scheme".
Or, if it is UEFI, then select GPT under the "Partition scheme".
- Now click on the START button.

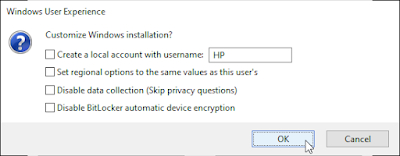
- On the "Windows User Experience", click on OK.
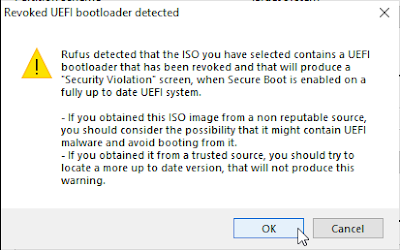
- On the "Revoked UEFI bootloader detected", click on OK.
- On the "WARNING" message, click on OK. It will take ~15 minutes.

- When it shows READY then click on Close.


Here's the ultimate guide: How to make Windows Bootable Pen drive?
Step 3: Boot from the USB
The next step is to boot your PC from Windows USB.
To boot from Windows USB Pendrive
- Disconnect network devices, Printers and any other devices from the PC on which you want to install Windows.
- Note down the Boot Menu key for your PC.
Here's the list of Boot Menu keys of almost any PC brand: Hotkeys for BootMenu / BIOS Settings - Now, insert the Windows USB Bootable Pendrive in the PC on which you want to install Windows.
- Now Power ON your PC.
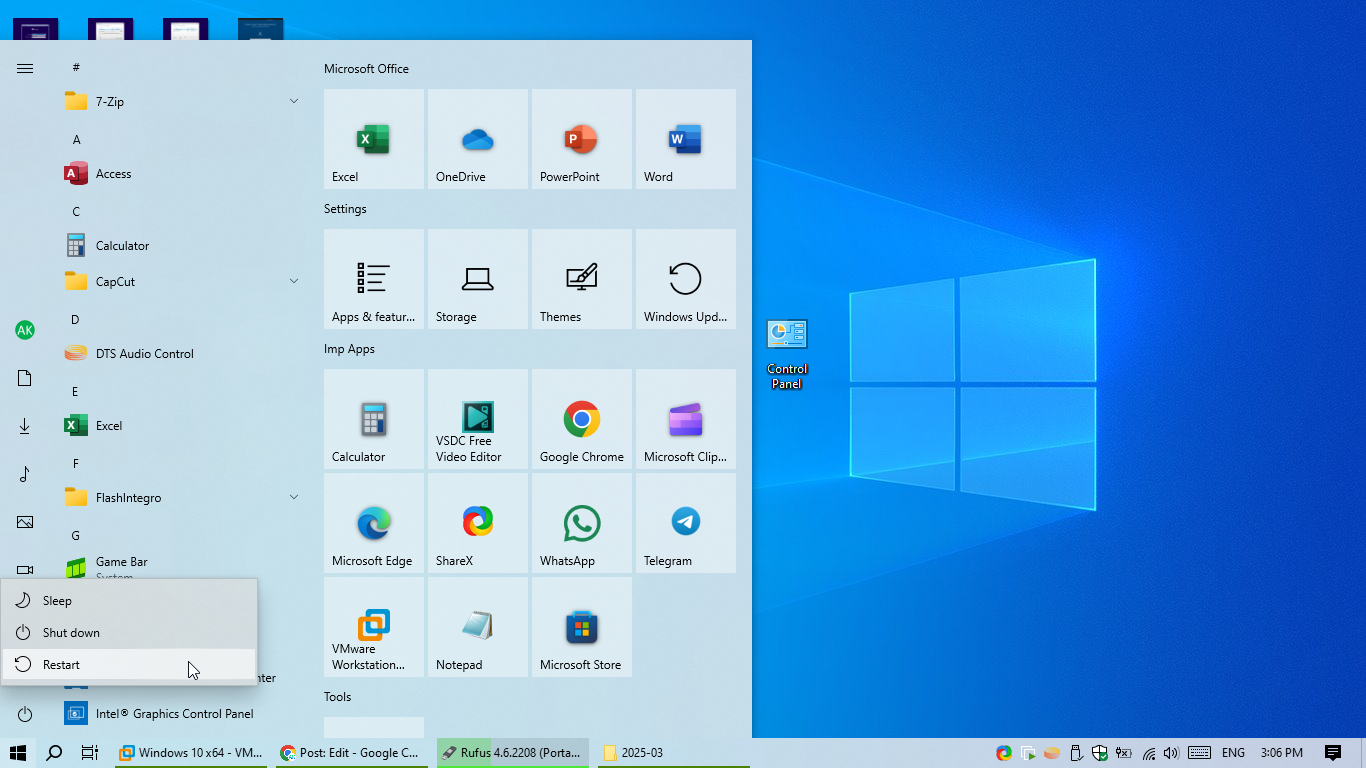
If your PC is already ON, then restart your computer: click on the Start button (at the bottom-left), then click on Power. And then select Restart.
- When the PC brand logo appears, Immediately press the Boot Menu key repeatedly, about once every second, until the Startup Menu opens.
- Use the up or down arrow key to select the USB option, and then press Enter key.
- On prompt, press any key to boot from the USB flash drive.
If you can't able to boot from a USB drive using the above method, then check the ultimate guide:
Step 4: Install Windows 10
The Windows installation process has two main parts: setup and out-of-box experience (OOBE).
Step 4.1: Windows 10 Setup
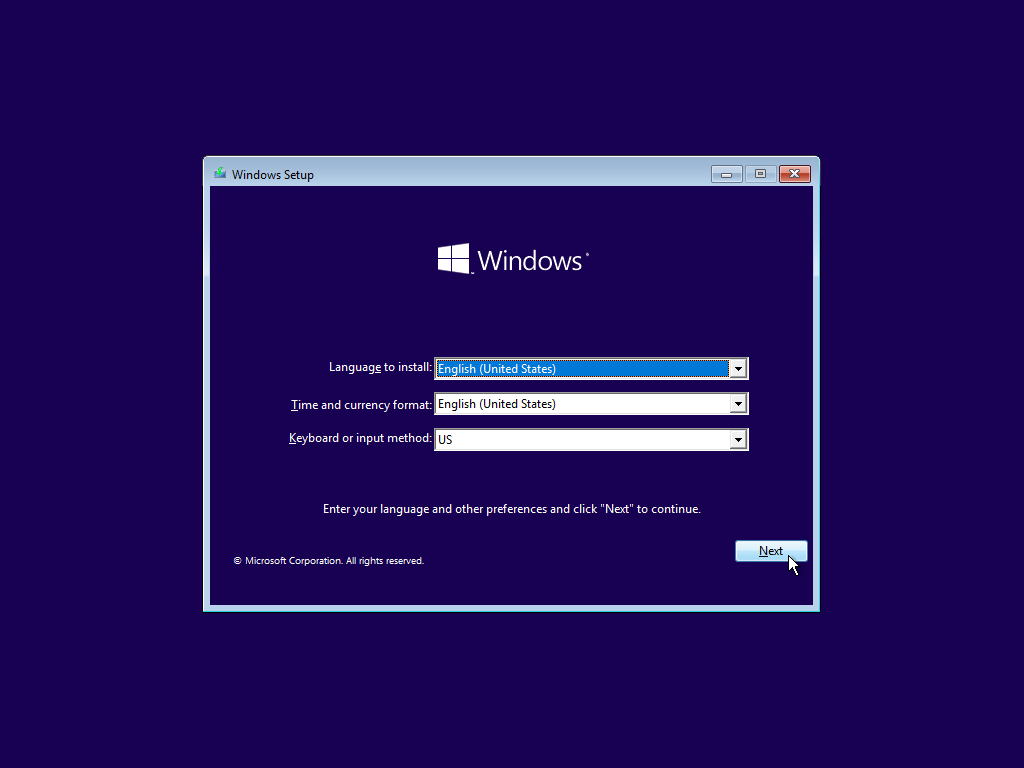
- On the "Windows Setup", If your Language, Time and currency and keyboard or input method differ from the default selections, select the correct settings. And then click the Next button.

- Click on "Install now".

- If you see the "Activate Windows", this means that Windows licence is not included with your PC.
Here click on "I don't have a product key".
- On the "Select the operating system you want to install", select an edition (say Windows 10 Pro) and click on Next.
The selection has to match the edition of your product key. If you don't select the correct edition, Windows won't activate, and you'll have to redo Step 4.
Here is the Comparison chat of Windows 10 editions.
- On the "Applicable notices and license terms", check the "I accept the license terms" and then click on Next.

- On the "Which type of installation do you want?", select "Custom: Install Windows only (advanced)".

- Your device will now display a list of drives and partitions.Option 1: if you are doing a clean install (removing everything on the PC), then Highlight each drive/partition in the list and select Delete. When the Windows Setup notification appears, select OK.Complete the above step for every drive in the list except the one that says Unallocated Space. When you’re finished, only Drive 0 Unallocated Space should remain.Create a new partition for Windows installation: highlight the Unallocated Space option, and click on the New button. Specify the amount of space (in megabytes) to allocate for the installation of Windows (100000 MB recommended). Click the Apply button then on the OK button. (Alongside the custom partition, Windows will also create additional partitions automatically required to install and run the operating system).Create one more partition for data backups: Select the Unallocated Space option. Click the New button to create additional partitions with the remaining space and then specify the space, click on Apply and then on OK. (You can also create partitions after the installation). Now, select the partition on which you want to install Windows and click on Next.--------------------------------Option 2: if you want to delete data from the Windows partition only (not want to lose data from other partitions like Local Disk D), then you have to delete the Windows partition (You have to identify which is the Windows partition according to the size of the partition), Recovery partition (size ~500 MB) and System Partition (size ~100 MB).After deleting, highlight the Unallocated Space partition and then click on Next.

Option 1: Clean install 
Option 2: Delete data from the Windows partition only - The Windows setup screen will now display "Installing Windows". This will take some time. While installing, your device will restart several times.


If you plan to decommission the device, you can stop now and let the new owner complete the out-of-box experience.
Or, continue to Windows 10 out-of-box experience.
Step 4.2: Windows 10 out-of-box experience
After the setup, you must continue with the out-of-box experience to configure your preferences.
Here I am installing Windows 10 2022 Update [version 22H2].
To complete the OOBE on Windows 10, use these steps:
Make sure that no network device is connected to your PC.
- On the "Let's start with region. Is this right?," select your region/country and then click on Yes.

- On the "Is this the right keyboard layout?", select the US and click on Yes.

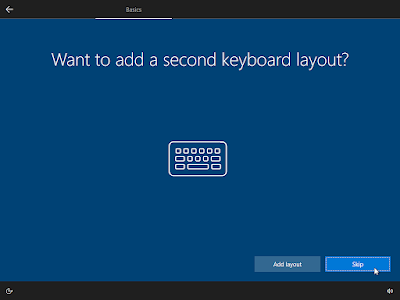
- On the "Want to add a second keyboard layout?", click on Skip (unless you need to add a second keyboard layout).
- On the "Let's connect you to a network", click on "I don't have internet".

- On the "There's more to discover when you connect to the internet", click on "Continue with limited setup".

- On the "Who's going to use this PC?", enter your name and click on Next.

- On the "Create a super memorable password", click on Next.

- On the "Choose privacy settings for your device", turn OFF all options and then click on Accept.

- On the "Let Cortana help you get things done", click on "Not now".


After you complete the steps, the new settings will apply to the installation of Windows, and you should be able to see the default desktop experience.
Setup 5: Complete setup after installation of Windows
After the installation, check that Windows isn't missing any critical updates or drivers.
Now connect the Internet to your computer.
Step 5.1: Install updates and drivers
To install Windows Updates and required Drivers:
- Press Windows + I to open Settings.
- In Settings, click on "Update & Security".

- From the left panel, select "Windows Update".

- In "Windows Update", click on "Check for updates".
If it shows "Checking for updates..." or "Updates available", then wait for it to install updates. - You may need to click on Install or "Restart now".


Once you complete the steps, Windows will install the required drivers, cumulative updates, servicing stack updates, virus definition updates, drivers and more.
For information about Windows update terminology, see the article about the types of Windows updates and the monthly quality update types.
Step 5.2: Check missing drivers
However, Windows Update installs all required drivers when you update Windows. But sometimes it fails to detect devices.
To determine whether drivers are missing, use these steps:
- Press Windows + X and then M to open "Device Manager".
- Confirm that none of the devices has a yellow or red mark, and make sure nothing is listed as unknown.


If one or multiple devices have problems, you may need to manually download and install the latest drivers from your computer manufacturer's support website.
Step 6: Reinstall Apps & Games
It's now time to reinstall your apps & games. You can now install most of your apps from the new Microsoft Store.
Comments
Post a Comment